Introduction
Easy Christmas Treats are a staple of the festive season, and for good reason – they’re delicious, fun to make, and bring people together. As the holiday season approaches, the aroma of cinnamon and vanilla wafts through the air, making our mouths water in anticipation of the tasty treats to come. Crispy holiday treats, in particular, are a favorite among many, with their perfect combination of crunchy exterior and soft interior.
The festive season is all about spreading joy and cheer, and what better way to do that than with a plate of freshly baked crispy holiday treats? The sound of crunching and chewing fills the room as we indulge in these sweet delights. Whether you’re hosting a holiday party or just want to brighten up a cold winter’s day, these treats are sure to be a hit.
So, what makes these easy Christmas treats so special? For one, they’re incredibly easy to make, requiring just a few simple ingredients and some basic kitchen equipment. They’re also highly customizable, so you can get creative with different shapes, flavors, and decorations to make them truly unique.
Why You’ll Love This Recipe
This recipe for crispy holiday treats is a game-changer, offering a unique combination of textures and flavors that will leave you and your loved ones wanting more. The combination of crunchy and soft is absolutely irresistible, and the addition of walnuts and chocolate chips gives these treats a depth of flavor that’s hard to beat.
But what really sets this recipe apart is its ability to capture the essence of the holiday season. The smell of baking spices and melting chocolate fills the air, transporting you to a winter wonderland of festive cheer and joy. Whether you’re making these treats for a holiday party or just as a special treat for yourself, they’re sure to bring a smile to your face and a twinkle to your eye.
So, if you’re looking for a recipe that’s easy, delicious, and guaranteed to get you in the holiday spirit, look no further than these crispy holiday treats. With their perfect balance of crisp and chew, they’re the perfect way to spread some holiday cheer and make the season a little brighter. You can also try our chocolate crinkle cookies for another delicious holiday treat.
Ingredients
- 2 cups all-purpose flour
- 1 tsp baking powder
- 1 tsp baking soda
- 1 tsp salt
- 1 cup unsalted butter, softened
- 3/4 cup granulated sugar
- 1/2 cup brown sugar
- 2 large eggs
- 2 tsp vanilla extract
- 2 cups chopped walnuts
- 1 cup semisweet chocolate chips
- 1 cup crushed candy canes (optional)
Ingredient Notes & Substitutions
When it comes to making crispy holiday treats, the ingredients you choose can make all the difference. For this recipe, we recommend using high-quality unsalted butter and pure vanilla extract to give the treats a rich, nuanced flavor. You can also customize the recipe by adding different mix-ins, such as dried cranberries or chopped pecans, to create a unique flavor combination.
In terms of substitutions, you can replace the all-purpose flour with a gluten-free flour blend if you need to accommodate dietary restrictions. You can also use dark chocolate chips instead of semisweet for a deeper, more intense flavor. Just be sure to adjust the amount of sugar accordingly, as dark chocolate can be quite bitter.
One of the best things about this recipe is its flexibility – you can make it your own by adding your favorite ingredients and mix-ins. So don’t be afraid to get creative and experiment with different combinations to find your perfect crispy holiday treat! For more ideas, check out our soft Christmas cookies recipe.
Equipment Needed
To make these crispy holiday treats, you’ll need a few basic pieces of equipment, including an oven, baking sheet, and parchment paper. You’ll also need a cookie cutter to cut out the shapes, and a wire rack to cool the treats once they’re baked.
In addition to these essentials, you may also want to have some decorating supplies on hand, such as crushed candy canes or sprinkles, to add a festive touch to your treats. With these simple tools and ingredients, you’ll be well on your way to creating a batch of crispy holiday treats that are sure to impress.
Step-by-Step Instructions
- Preheat oven to 375°F (190°C).
- Mix ingredients together until a dough forms, about 5 minutes.
- Roll out the dough to 1/4 inch thickness.
- Cut into desired shapes using a cookie cutter.
- Place shapes on a baking sheet lined with parchment paper, leaving 1 inch of space between each treat.
- Bake for 15-20 minutes, or until golden brown.
- Remove from oven and let cool on the baking sheet for 5 minutes.
- Transfer to a wire rack to cool completely.
- Serve and enjoy.
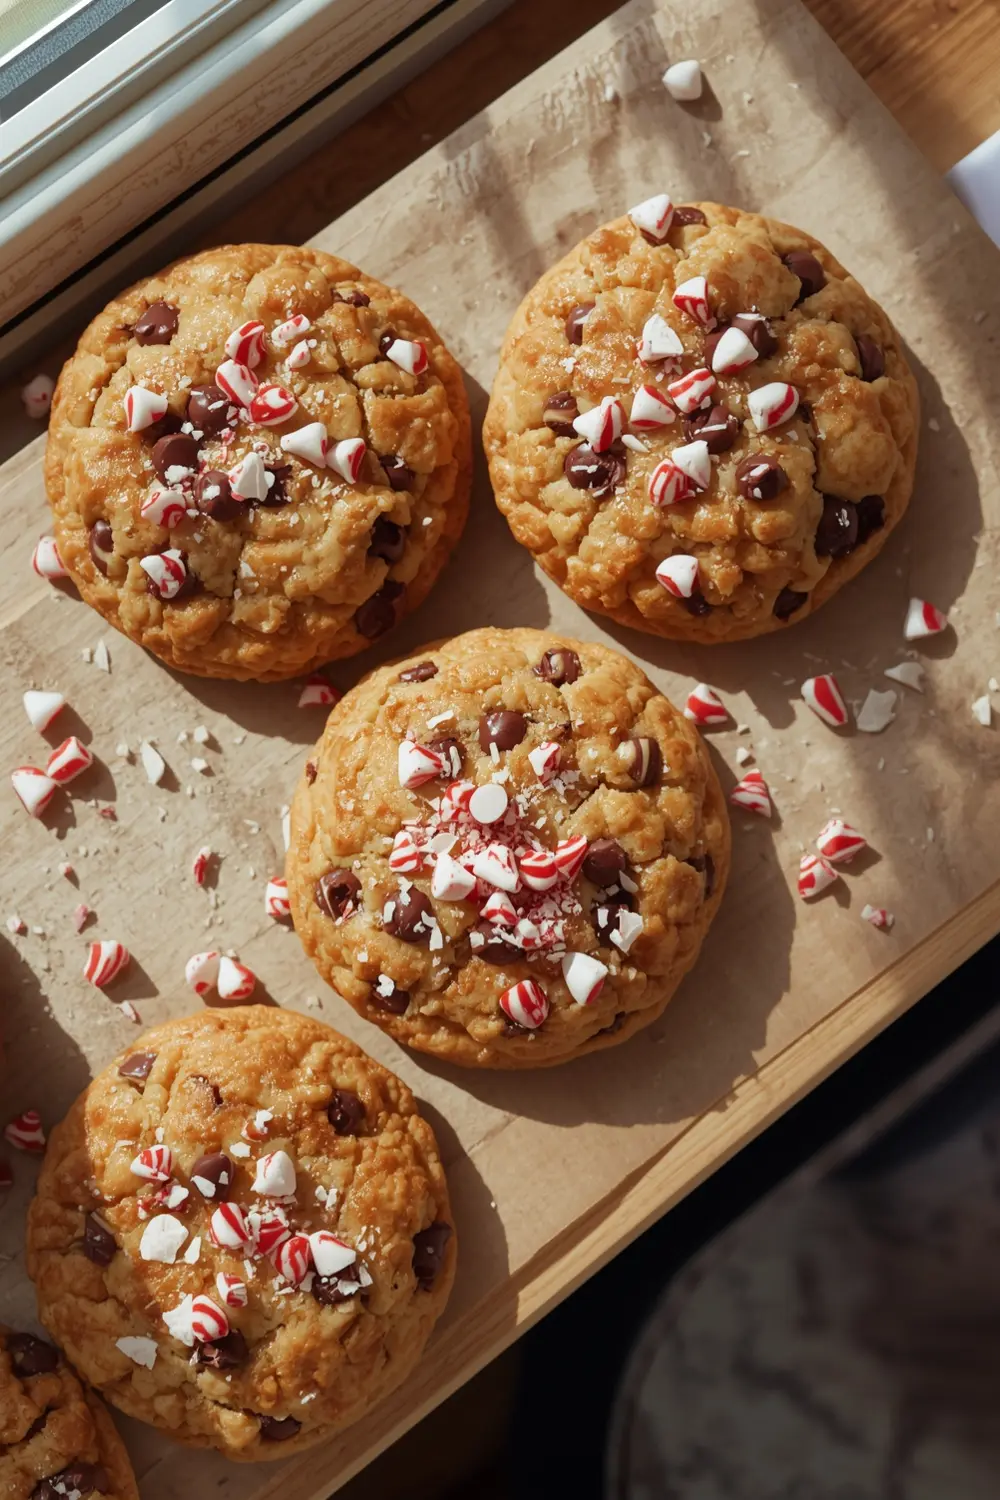
Visual Guide & Tips
As you work through the recipe, you’ll want to keep an eye on the texture and consistency of the dough. When you’re mixing the ingredients together, the dough should come together in a smooth, pliable ball. If it’s too sticky, you can add a little more flour – but be careful not to overdo it, or the treats may become too dense.
When you’re rolling out the dough, you’ll want to aim for a uniform thickness of about 1/4 inch. This will help the treats bake evenly and prevent them from becoming too thick or thin. You can also use a rolling pin to help you achieve a smooth, even surface.
Finally, when you’re baking the treats, keep an eye on the time and temperature. You want the treats to be golden brown and crispy, but not overcooked or burned. With a little practice and patience, you’ll be a pro at making crispy holiday treats in no time! For more holiday baking ideas, check out our no-bake Christmas treats recipe.
Pro Tips & Tricks
One of the most important things to keep in mind when making crispy holiday treats is the baking time and temperature. You want the treats to be crispy and golden, but not overcooked or burned. To achieve this, make sure to keep an eye on the treats as they bake, and adjust the time and temperature as needed.
Another great tip is to use high-quality ingredients, such as real butter and pure vanilla extract, to give the treats a rich, nuanced flavor. You can also customize the recipe by adding different mix-ins, such as dried cranberries or chopped pecans, to create a unique flavor combination.
In addition to these tips, you may also want to consider decorating your treats with crushed candy canes or sprinkles to add a festive touch. This is a great way to make your treats stand out and add a little extra fun to the holiday season.
Storage & Freezing
To keep your crispy holiday treats fresh and delicious, it’s best to store them in an airtight container at room temperature. You can also freeze the treats for up to 2 months, which is a great way to get a head start on your holiday baking.
When you’re ready to serve, simply thaw the treats at room temperature or reheat them in the oven for a few minutes. This will help restore their crispiness and freshness, and make them taste like they were just baked.
FAQs
Q: How do I keep my crispy holiday treats crispy?
A: To keep your treats crispy, make sure to store them in an airtight container at room temperature. You can also freeze them for up to 2 months and thaw as needed.
Q: Can I make these treats ahead of time?
A: Yes, you can make these treats ahead of time and store them in an airtight container at room temperature or freeze for up to 2 months.
Q: What’s the best way to decorate my crispy holiday treats?
A: You can decorate your treats with a variety of toppings, such as crushed candy canes, sprinkles, or chocolate chips. Get creative and have fun with it!
Q: Can I customize the recipe with different mix-ins?
A: Yes, you can customize the recipe by adding different mix-ins, such as dried cranberries or chopped pecans, to create a unique flavor combination.
Q: How long do the treats stay fresh?
A: The treats will stay fresh for up to 5 days when stored in an airtight container at room temperature. You can also freeze them for up to 2 months for longer storage.
Q: Can I make these treats gluten-free?
A: Yes, you can make these treats gluten-free by substituting the all-purpose flour with a gluten-free flour blend. Just be sure to adjust the recipe accordingly and use a gluten-free flour that is designed for baking.
Nutritional Information (Approximate)
Calories: 450 kcal
Protein: 6g
Carbs: 35g
Fat: 25g
Sugar: 25g
Conclusion
And there you have it – a delicious recipe for crispy holiday treats that’s sure to become a new favorite. With their perfect combination of crisp and chew, these treats are the perfect way to spread some holiday cheer and make the season a little brighter.
So why not give them a try? With their easy-to-follow instructions and customizable recipe, you can make these treats your own and enjoy them with friends and family all season long. Don’t forget to share your creations with me on social media – I’d love to see what you come up with! Did you make this? Pin it on Pinterest or tag me on Instagram @EvasRecipes!
Crispy Holiday Treats
Ingredients
Method
- Preheat oven to 375°F (190°C).
- Mix ingredients together until a dough forms, about 5 minutes.
- Roll out the dough to 1/4 inch thickness.
- Cut into desired shapes using a cookie cutter.
- Place shapes on a baking sheet lined with parchment paper, leaving 1 inch of space between each treat.
- Bake for 15-20 minutes, or until golden brown.
- Remove from oven and let cool on the baking sheet for 5 minutes.
- Transfer to a wire rack to cool completely.
- Serve and enjoy.